GitHub Workflows
Our standard deployments use a release-based deployment strategy.
Workflow structure
All site repositories should include a .github/workflows directory with the following files
.github/workflows
├── ci.yaml
├── deploy-production.yaml
├── deploy-staging.yaml
└── deploy.yaml
Deployments
Both staging and production workflows allow a specific ref to be used to deploy from via a manual workflow_dispatch trigger.
This allows engineers to deploy a previous tag, commit or branch.
This is useful in cases where hotfixing is required to get something to production quickly, for example.
Staging
All work commited through Pull Requests to main are deployed to staging.
The deploy-staging.yaml workflow handles this.
Production
Once a production deployment is required, engineers must create a new release. This is typically done by navigating to https://github.com/FosterCommerce/
On the new release page
- Choose a tag - This should be in the format YYYY-MM-DD.X
- Which represents the current date and the current number of the deployment for the day.
- For example,
2024-09-19.1
- Ensure that you click "Create a new tag: ..." to tell GitHub that you want to create that tag
- Set the release title to be the same as the tag
- Click "Generate release notes" which tells GitHub to generate release documentation based on all Pull Requests since the last release.
- Click "Publish" to create the release and trigger a production deployment.
Deployment configuration
Deployments are configured in GitHub in two places:
- In the Environments settings page (https://github.com/FosterCommerce/
/settings/environments) 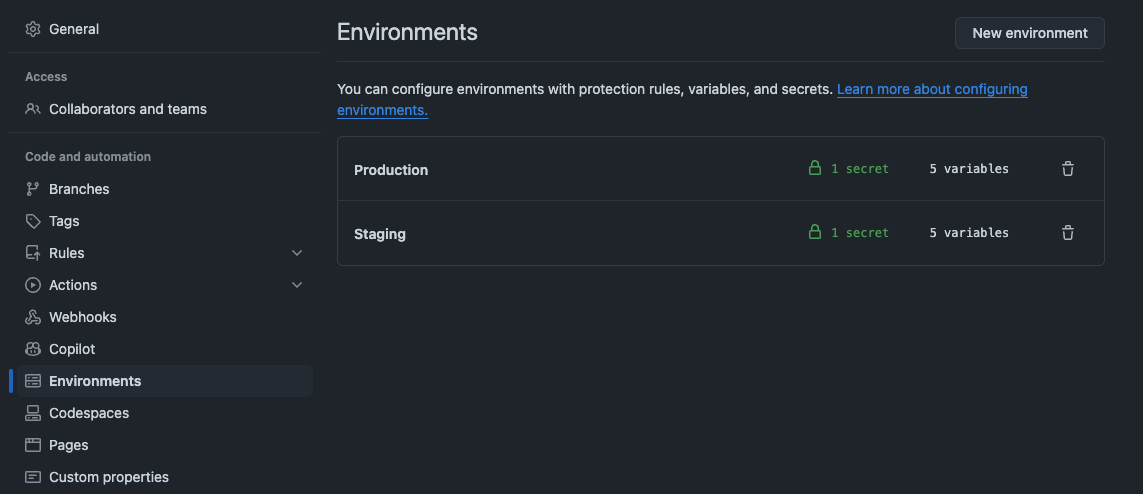
- And in the Actions Secrets and Variables page (https://github.com/FosterCommerce/
/settings/secrets/actions) 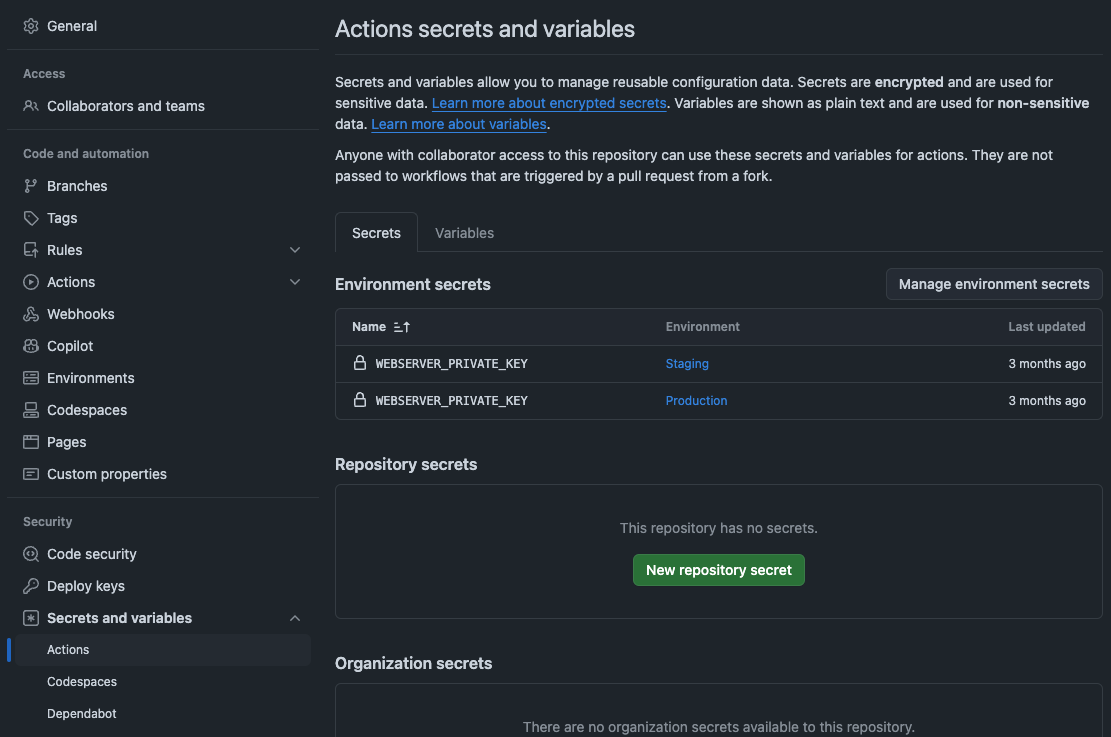
Environment configuration
Deployments use GitHub's Environments feature. Because of this, we require two environments to be configured for each site, Production and Staging.
Standard deployments require the following secrets and variables:
Secrets
WEBSERVER_PRIVATE_KEY- Private key used by SSH for copying files over onto the server and to run any deployment scripts.
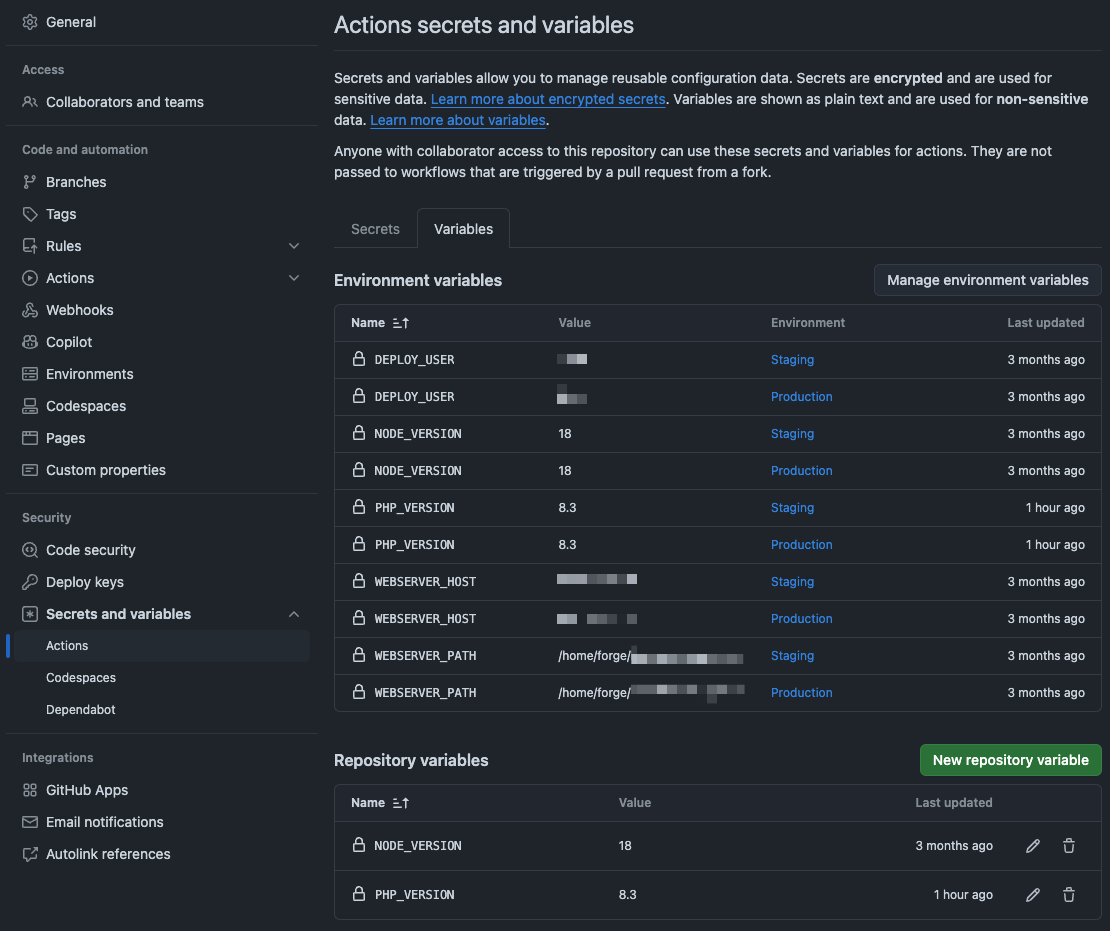
Variables
DEPLOY_USER- The SSH user use by SSH for copying files and running scripts on the server. This is generally the defaultforgeuser for Forge provisioned sites.NODE_VERSION- The version of node to be used when runningnpm run build.PHP_VERSION- The version of PHP to use when runningcomposer install.WEBSERVER_HOST- The hostname/ip address of the server where we'll be copying files.- Important: This is not the reserved IP assigned to the server. This must be the servers actual IP. Otherwise it makes it can make it difficult to set up a new server without pointing the reserved IP at the new server.
WEBSERVER_PATH- The path where files should be copied. This is generally/home/forge/<site host>, for example/home/forge/www.mysite.com.
Actions secrets and variables
This will generally only have fallback variables used for CI where there is no environment.
Variables
NODE_VERSION- The version of node to be used when runningnpm run build.PHP_VERSION- The version of PHP to use when runningcomposer install.
Updating deployment configuration
When a new server has been provisioned for either staging or production (or both), the relevant variables need to be updated to.
For example, if we had www.mysite.com at 192.168.1.10, and we created a new server, at 192.168.1.17, that deployments need to target, we can update the WEBSERVER_HOST for the Production environment to point at 192.168.1.17.
The same applies when upgrading PHP versions. If we upgrade the PHP version in forge by installing a newer PHP version, then we need to set that version for the specific environment in GitHub.
Continuous Integration
Our typical ci.yaml workflow runs PHPStan, ECS and Rector to ensure code quality standards.
On projects with JS-based frontends or which rely on frameworks such as Alpine.js, the CI workflow will also include checks for ESLint and Prettier.
The CI workflow typically only requires the NODE_VERSION and PHP_VERSION actions variables.